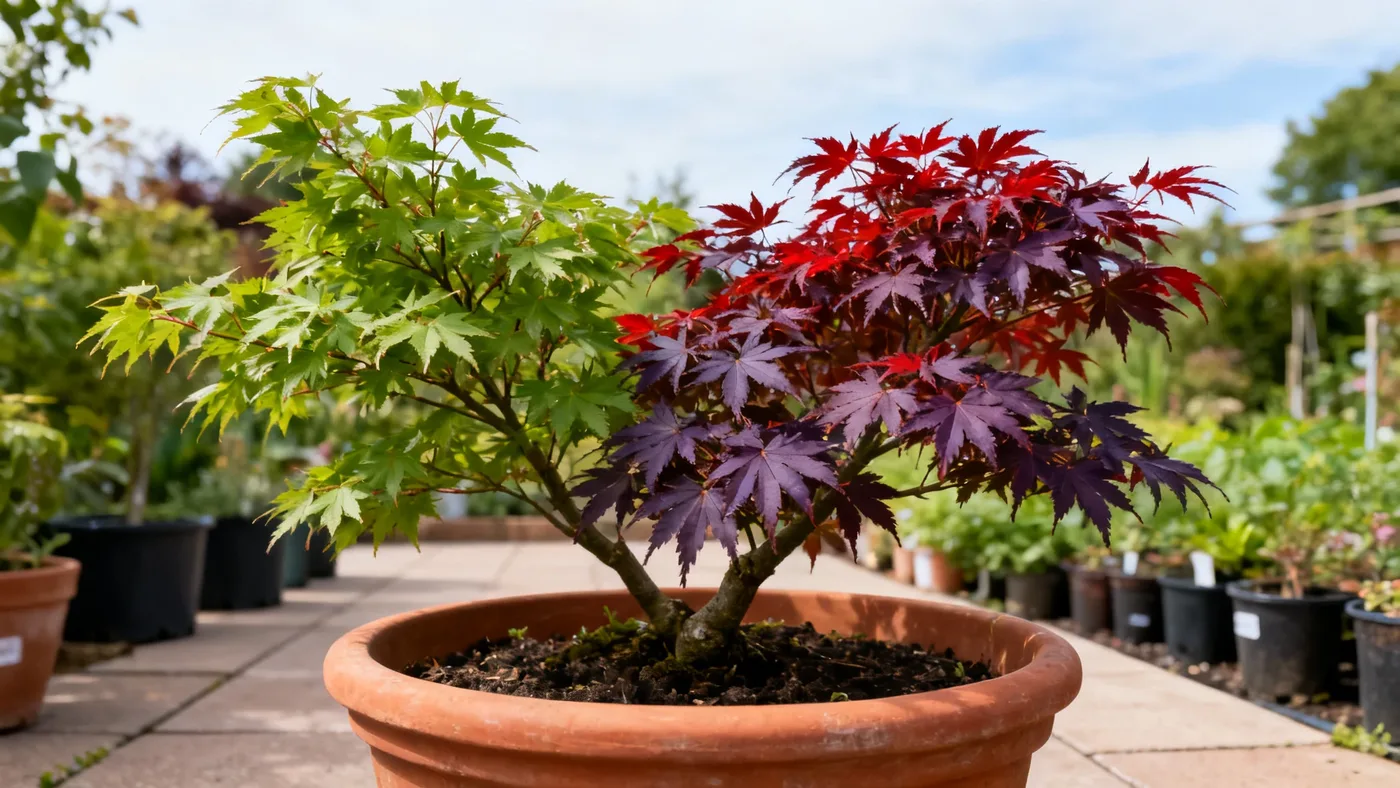
Growing a Dwarf Japanese Maple in a Pot or Container
A dwarf Japanese maple in a container brings the quiet elegance of a specimen tree to any patio, balcony, or courtyard. These slow-growing shrubs thrive in pots when you match their needs for drainage, consistent moisture, and the right light. This guide walks you through setup, planting, and year-round care so your container Japanese maple stays healthy and develops the rich fall color these plants are known for.
Why Dwarf Japanese Maples Work in Containers
Dwarf Japanese maple cultivars like 'Bloodgood', 'Crimson Queen', 'Tamukeyama', and 'Shaina' are ideal for container culture. They grow slowly, typically adding 6 to 12 inches per year, so they stay in proportion to a pot for years. Their mature size generally ranges from 4 to 8 feet tall and wide, depending on the cultivar, making them manageable even in smaller spaces. The branching structure and foliage color remain the focal point whether planted in a landscape or a container.
Container growing also gives you control over soil pH and drainage, both critical for this plant. Unlike in-ground planting, you can adjust light exposure by moving the pot seasonally and protect roots from freezing in colder zones.
Choosing the Right Container for Japanese Maple
The pot size matters. Start with a container at least 3 to 5 gallons for young nursery-grown Japanese maples sold in quart, #1, or #3 containers. As the plant grows, you may step up to a 7 to 10-gallon pot after two or three years. The best pot for a dwarf Japanese maple has drainage holes in the bottom and sides, if possible.
Material options include ceramic, terracotta, plastic, and wood. Terracotta and ceramic are porous, which helps prevent waterlogging but dries out faster in hot weather. Plastic and wood retain moisture longer. In zones 5 to 7, avoid dark pots in summer, as they can heat the soil too much. Light-colored pots moderate soil temperature better. Choose a pot that is slightly taller than it is wide, as this mimics the growth pattern of dwarf Japanese maples and provides better stability for the branching structure above.
Preparing Your Container Soil Mix
Dwarf Japanese maple is sensitive to poor drainage, so the soil mix is where container success begins. Use a rich, well-draining loam amended for drainage. A good recipe is 50% high-quality potting soil, 25% perlite or pumice, and 25% peat moss or coconut coir. This combination holds moisture without becoming compacted or waterlogged.
Soil pH should be slightly acidic to neutral, roughly 5.5 to 6.5. If you're unsure of your potting soil's pH, use a soil test kit or ask your local extension service for guidance. Many commercial potting soils lean slightly acidic already, so they're a good starting point. Avoid heavy garden soil or clay-based mixes, which retain too much water and compact over time.
Fill your container about one-third of the way with the prepared mix before planting.
Step-by-Step Planting Instructions
Step 1: Remove the Plant from Its Nursery Container
Gently tip the Japanese maple out of its nursery pot. If it's stuck, run water along the inside edge of the pot or cut away the container if needed. Loosen the root ball carefully with your fingers. If roots are tightly wound, make three or four vertical cuts along the sides of the root ball, about 1 inch deep. This encourages roots to grow outward into the new container soil.
Step 2: Position the Plant at the Right Depth
Place the root ball in the center of the prepared container. The top of the root ball should sit about 1 to 1.5 inches below the rim of the pot. This creates space for watering without overflow. Never bury the base of the trunk deeper than it was in the nursery pot, as this can cause rot.
Step 3: Backfill with Amended Soil
Fill around the root ball with your prepared soil mix. Gently firm the soil as you go to eliminate air pockets, but don't compress it hard. Leave a watering lip at the top of the pot as described in Step 2. The soil should be level with the top of the root ball when finished.
Step 4: Water Thoroughly
Water the newly planted container until water drains freely from the drainage holes. This settles the soil and eliminates air pockets. The first watering is critical. Let excess water drain for 10 to 15 minutes, then move the pot to its final location.
Step 5: Add a Mulch Layer (Optional)
A 1 to 2-inch layer of mulch, such as shredded bark, over the soil surface helps retain moisture and keeps roots cooler. Leave a 1-inch gap around the base of the trunk to prevent rot.
Watering: The Most Critical Container Task
Growing a Japanese maple in a pot requires consistent moisture. Containers dry out faster than in-ground soil, especially in hot weather or if you use terracotta. Check the soil moisture 2 to 3 times per week during the growing season. The soil should feel moist but not soggy at a depth of 2 inches.
Water when the top 1 inch of soil is dry to the touch. Pour slowly until water drains from the bottom, ensuring thorough saturation. Do not let the pot dry out completely, as drought stress can cause leaf scorch and weaken the plant.
In fall and winter, reduce watering frequency as growth slows, but do not let the container become bone dry. In zones 5 to 8, winter roots still need some moisture even when the plant is dormant.
If your area has hard water (high calcium), collect rainwater in a barrel or use filtered water when possible. While not essential, rainwater mimics natural conditions and avoids mineral salt buildup in the soil over time.
Light and Placement
Dwarf Japanese maple grows best in part sun to part shade. In cooler zones (5 to 7), more sun is tolerated and can enhance fall color. In hot climates or zone 9, provide morning sun with afternoon shade to prevent leaf scorch.
A south or east-facing patio in zones 5 to 7 works well. If you're in zone 8 or warmer, a spot that gets dappled shade from a larger tree or filtered afternoon shade is ideal. Avoid harsh, all-day sun exposure, especially in containers, where soil temperature climbs quickly.
Place the pot where you can monitor it closely and adjust placement if needed. The ability to move a container is one of its advantages.
Fertilizing Your Container Japanese Maple
Apply a light feeding in early spring with a balanced, slow-release fertilizer formulated for acid-loving or woody ornamentals. Follow the label rate, but lean toward the light side. Container plants can accumulate excess salts from fertilizer, so avoid over-fertilizing. A single spring application is usually enough for slow-growing dwarf Japanese maples.
If the plant shows pale or yellowing leaves mid-season, a diluted liquid fertilizer applied once in early summer can help. Resume normal care once new growth appears.
Seasonal Care and Pruning
Dwarf Japanese maple needs minimal pruning. In late fall to mid-winter while the plant is dormant, remove any dead branches or crossed limbs. Light shaping to maintain the branching structure can be done at this time. Avoid pruning in spring and summer, as fresh cuts bleed sap and can invite disease.
In fall, expect brilliant red, orange, or gold foliage depending on your cultivar. This display often lasts 4 to 6 weeks. Once leaves drop, the attractive branching structure becomes a winter feature. Some cultivars, like 'Sango-kaku' (coral bark maple), have colorful winter stems that add interest when foliage is gone.
Winter Protection in Containers
In zones 5 to 8, container roots are more vulnerable to freezing than in-ground roots because they're exposed on all sides. Protect the pot by wrapping it with burlap or placing it against a south-facing wall for added warmth. Alternatively, move the pot to an unheated garage or shed where it won't freeze solid but stays dormant.
Do not store the pot indoors in heated space, as this can break dormancy prematurely and expose emerging growth to outdoor frost. A cool garage or sheltered patio corner is ideal. Keep the soil from drying out completely during winter storage.
In zones 9 and warmer, winter protection is usually not needed, though a deep winter may slow growth briefly.
Common Container Mistakes to Avoid
- Overwatering in cool seasons: Reduce watering frequency in fall and winter, not because drought is good, but because the plant uses less water and the soil drains slower. Waterlogged roots can rot.
- Choosing the wrong soil: Avoid using garden soil or heavy potting mixes without drainage amendments. The soil is the foundation of container success.
- Ignoring drainage holes: A pot without drainage will kill the plant over time. Ensure holes are open and not blocked by debris.
- Letting the pot dry out completely: Unlike some plants, dwarf Japanese maple cannot tolerate drought stress in a container. Consistent moisture is non-negotiable.
- Placing the pot in harsh full sun: Even in cooler zones, afternoon shade protects foliage from scorch and moderates soil temperature.
- Skipping winter protection in colder zones: Unprotected pots in zones 5 to 7 may freeze solid, killing roots even though the plant would survive in the ground.
- Over-fertilizing: Container plants accumulate salts. One spring application is usually sufficient.
Expected Results and Timeline
A young nursery-grown dwarf Japanese maple in a container will establish in the first year with consistent care. By year two or three, branching becomes fuller and fall color deepens. The plant reaches a mature, well-shaped form in 5 to 10 years. With good siting and care, many container Japanese maples live 50 years or longer.
Do not expect dramatic size increases in the first year or two. The slow growth rate (6 to 12 inches per year) means the plant is steadily building a strong root system and branch structure. This patience is rewarded with a long-lived, beautiful specimen.
Quick Reference: Container Japanese Maple Care Checklist
| Task | Timing / Frequency | Details |
|---|---|---|
| Watering | 2-3 times per week (growing season) | Keep soil moist but not soggy; reduce frequency in fall/winter |
| Container Size | Initial planting | Start with 3-5 gallons; step up to 7-10 gallons after 2-3 years |
| Soil Mix | At planting | 50% potting soil, 25% perlite, 25% peat moss; pH 5.5-6.5 |
| Light | Year-round | Part sun to part shade; afternoon shade in hot climates |
| Fertilizing | Early spring | Light application of slow-release, acid-loving formula; repeat early summer if needed |
| Pruning | Late fall to mid-winter | Remove dead wood and shape lightly while dormant |
| Winter Protection | Zones 5-8, late fall | Wrap pot or move to unheated shelter; keep soil from drying out |
| Repotting | Every 2-3 years | Move to next pot size if roots circle the soil surface |
Growing Japanese Maple in a Pot: Final Notes
Container culture suits dwarf Japanese maple better than many plants because you can control the environment completely. The key is starting with the right soil, choosing a pot with good drainage, and committing to consistent watering. These slow-growing plants reward patience with decades of beautiful foliage and form.
For a complete overview of dwarf Japanese maple care in all settings, see our Dwarf Japanese Maple Care Guide. Container care shares the same principles of drainage, light, and moisture management outlined there.